Right-click on top of the “Network Manager” icon, and select “Edit Connections”.
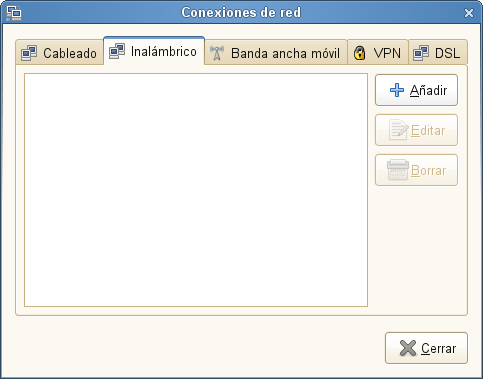
A window will be opened, select wireless connections and click to “Add new network”.

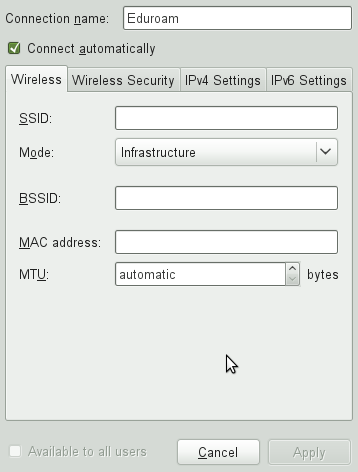
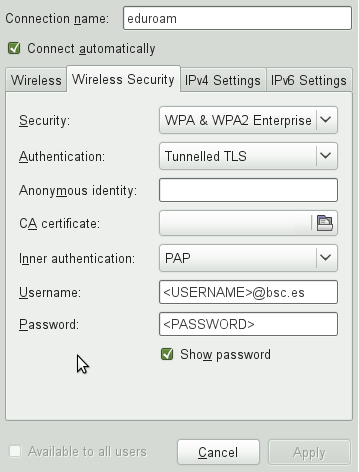
A new window will appear where all the information about how to connect to “eduroam” network need to be filled up, the summarize of the data that needs to be included is:
| SSID | eduroam |
| Security | WPA/WPA2 Enterprise |
| Authentication | Tunneled TLS (TTLS) |
| Internal Authentication | PAP |
| Username | <Your BSC-CNS Ldap Username> |
| Password | <Your BSC-CNS Ldap Password> |
| IP Settings | Automatic - DHCP |
Here you have some screenshots about how it must look like when you have introduced the data, once everything is filled up, press the button to store all this information. Depending on the behaviour that you want you can check the “Automatic connection” if you want “Network Manager” to connect automatically as soon as this wireless network is available or do you prefer to enable it manually.


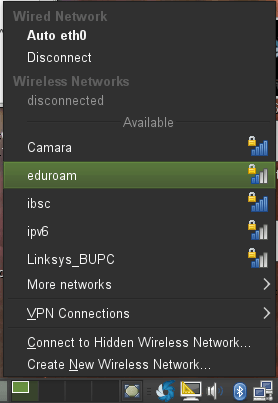
Once all this is configured your laptop is ready to connect to “eduroam” network, if you checked the automatic connection “Network Manager” will try to connect to eduroam with the data provided. If you prefer to connect manually, then left-click on top of “Network Manager” icon and select “eduroam”, all your configuration included will be used to connect.

