Data management
- General
- StarLife
Transferring files
There are several ways to copy files from/to the Cluster:
- Direct scp, rsync, sftp... to the login nodes
- Using a Data transfer Machine which shares all the GPFS filesystem for transferring large files
- Mounting GPFS in your local machine
Direct copy to the login nodes.
As said before no connections are allowed from inside the cluster to the outside world, so all scp and sftp commands have to be executed from your local machines and never from the cluster. The usage examples are in the next section.
On a Windows system, most of the secure shell clients come with a tool to make secure copies or secure ftp's. There are several tools that accomplish the requirements, please refer to the Appendices, where you will find the most common ones and examples of use.
Data Transfer Machine
We provide special machines for file transfer (required for large amounts of data). These machines are dedicated to Data Transfer and are accessible through ssh with the same account credentials as the cluster. They are:
- transfer1.bsc.es
- transfer2.bsc.es
- transfer3.bsc.es
- transfer4.bsc.es
These machines share the GPFS filesystem with all other BSC HPC machines. Besides scp and sftp, they allow some other useful transfer protocols:
scp
localsystem$ scp localfile username@transfer1.bsc.es:localsystem$ scp username@transfer1.bsc.es:remotefile localdirrsync
localsystem$ rsync -avzP localfile_or_localdir username@transfer1.bsc.es:localsystem$ rsync -avzP username@transfer1.bsc.es:remotefile_or_remotedir localdir
- We recommend using the -chown {user}:{group} option when copying data to a machine using rsync, since otherwise the data might be written to your primary group, filling your quota.
sftp
localsystem$ sftp username@transfer1.bsc.es
sftp> get remotefile
localsystem$ sftp username@transfer1.bsc.es
sftp> put localfile
Setting up sshfs
- Linux
- Windows
Create a directory inside your local machine that will be used as a mount point.
Run the following command below, where the local directory is the directory you created earlier. Note that this command mounts your GPFS home directory by default.
sshfs -o workaround=rename <yourHPCUser>@transfer1.bsc.es: <localDirectory>
From now on, you can access that directory. If you access it, you should see your home directory of the GPFS filesystem. Any modifications that you do inside that directory will be replicated to the GPFS filesystem inside the HPC machines.
Inside that directory, you can call "git clone", "git pull" or "git push" as you please.
In order to set up sshfs in a Windows system, we suggest two options:
- sshfs-win
Follow the installation steps from their official repository.
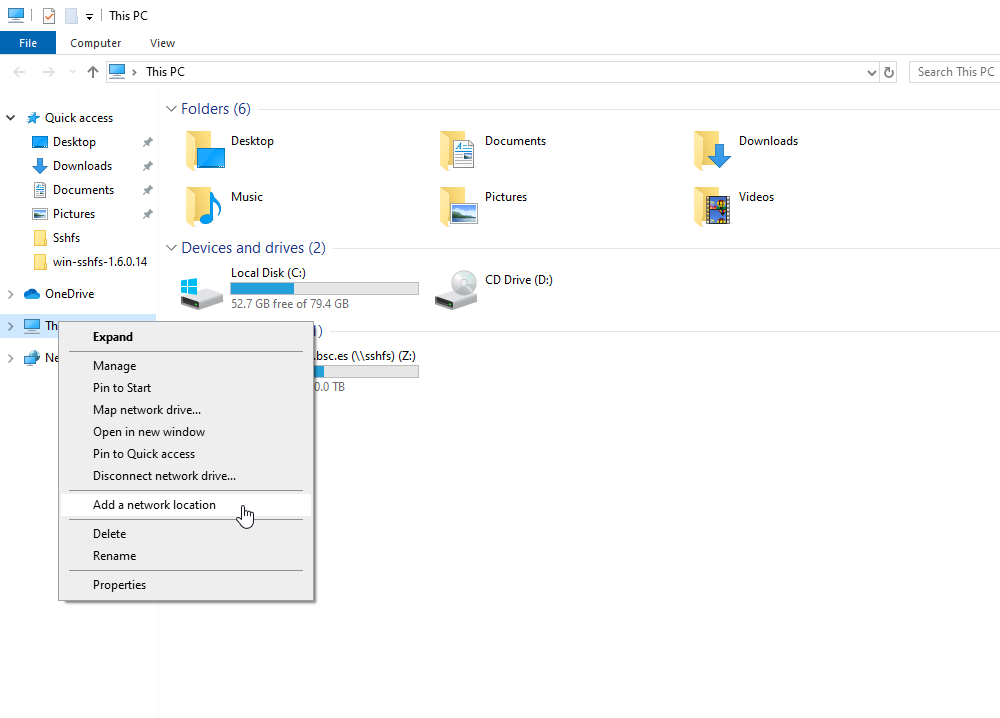
Open File Explorer and right-click over the "This PC" icon in the left panel, then select "Map Network Drive".
- In the new window that pops up, fill the "Folder" field with this route:
\\sshfs\<your-username>@transfer1.bsc.es
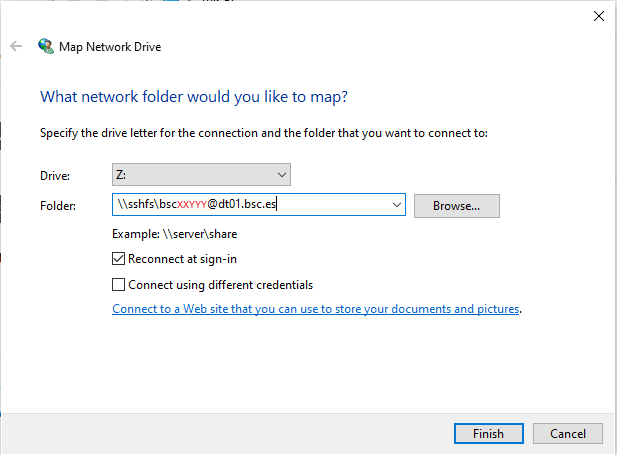
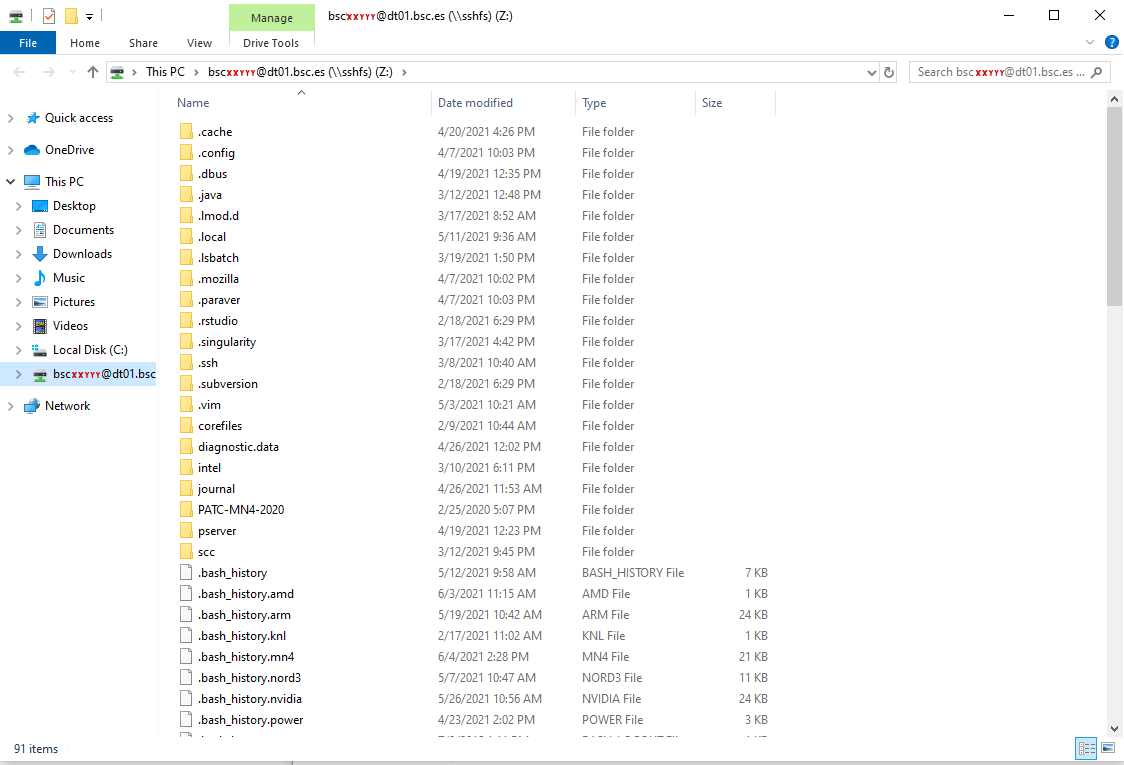
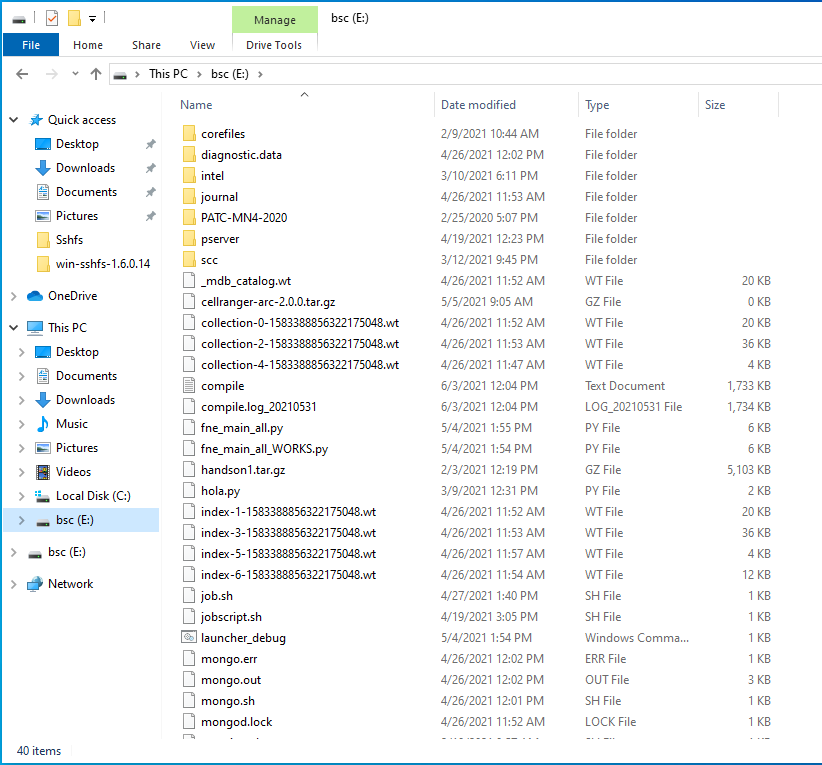
- After clicking "Finish", it will ask you for your credentials and then you will see your remote folder as a part of your filesystem.
- win-sshfs
Install Dokan 1.0.5 (is the version that works best for us)
Install the latest version of win-sshfs. Even though the installer seems to do nothing, if you reboot your computer the direct access to the application will show up.
The configuration fields are:
% Drive name: whatever you want
% Host: transfer1.bsc.es
% Port: 22
% Username: <your-username>
% Password: <your-password>
% Directory: directory you want to mount
% Drive letter: preferred
% Mount at login: preferred
% Mount folder: only necessary if you want to mount it over a directory, otherwise, empty
% Proxy: none
% KeepAlive: preferred
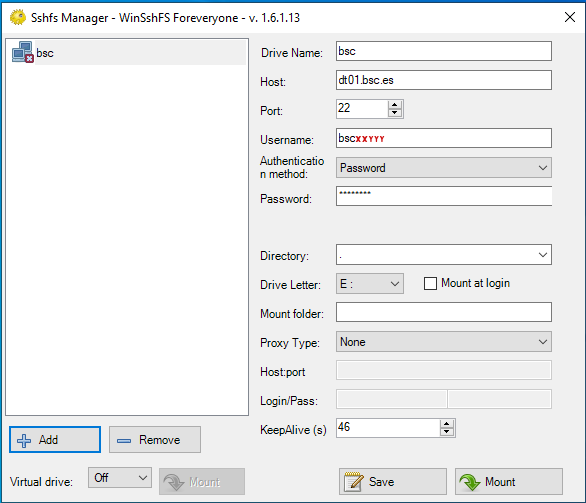
- After clicking "Mount" you should be able to access to your remote directory as a part of your filesystem.
GPFS Tapes
To move or copy from/to tapes you have to use our special commands, available in the transfer[1-4].bsc.es machines or any other machine by loading "transfer" module:
- dtcp, dtmv, dtrsync, dttar
These commands submit a job into a special class performing the selected command. Their syntax is the same than the shell command without 'dt' prefix (cp, mv, rsync, tar).
- dtq, dtcancel
dtq
dtq shows all the transfer jobs that belong to you, it works like squeue in SLURM.
dtcancel <job_id>
dtcancel cancels the transfer job with the job id given as parameter, it works like scancel in SLURM.
- dttar: submits a tar command to queues. Example: Taring data from /gpfs/ to /gpfs/tapes/hpc
dttar -cvf /gpfs/tapes/hpc/group01/outputs.tar ~/OUTPUTS
- dtcp: submits a cp command to queues. Remember to delete the data in the source filesystem once copied to AA to avoid duplicated data.
# Example: Copying data from /gpfs to /gpfs/tapes/hpc
dtcp -r  ~/OUTPUTS /gpfs/tapes/hpc/group01/
# Example: Copying data from /gpfs/tapes/hpc to /gpfs
dtcp -r  /gpfs/tapes/hpc/group01/OUTPUTS ~/
- dtrsync: submits a rsync command to queues. Remember to delete the data in the source filesystem once copied to AA to avoid duplicated data.
# Example: Copying data from /gpfs to /gpfs/tapes/hpc
dtrsync -avP  ~/OUTPUTS /gpfs/tapes/hpc/group01/
# Example: Copying data from /gpfs/tapes/hpc to /gpfs
dtrsync -avP  /gpfs/tapes/hpc/group01/OUTPUTS ~/
- dtsgrsync: submits a rsync command to queues switching to the specified group as the first parameter. If you are not added to the requested group, the command will fail. Remember to delete the data in the source filesystem once copied to the other group to avoid duplicated data.
# Example: Copying data from group01 to group02
dtsgrsync group02 /gpfs/projects/group01/OUTPUTS /gpfs/projects/group02/
- dtmv: submits a mv command to queues.
# Example: Moving data from /gpfs to /gpfs/tapes/hpc
dtmv ~/OUTPUTS /gpfs/tapes/hpc/group01/
# Example: Moving data from /gpfs/tapes/hpc to /gpfs
dtmv /gpfs/tapes/hpc/group01/OUTPUTS ~/
Additionally, these commands accept the following options:
--blocking: Block any process from reading file at final destination until transfer completed.

--time: Set up new maximum transfer time (Default is 18h).
It is
Repository management (GIT/SVN)
There's no outgoing internet connection from the cluster, which prevents the use of external repositories directly from our machines. To circumvent that, you can use the "sshfs" command in your local machine, as explained in the previous Setting up sshfs sections, for both Linux and Windows.
Doing that, you can mount a desired directory from our GPFS filesystem in your local machine. That way, you can operate your GPFS files as if they were stored in your local computer. That includes the use of git, so you can clone, push or pull any desired repositories inside that mount point and the changes will transfer over to GPFS.
Transferring files
To copy files from/to the Cluster you can use direct scp or sftp to the login nodes. We recommend to use sl2.bsc.es for transferring large amount of data.
Direct copy to the login nodes.
As said before no connections are allowed from inside the cluster to the outside world, so all scp and sftp commands have to be executed from your local machines and never from the cluster. The usage examples are in the next section.
On a Windows system, most of the secure shell clients come with a tool to make secure copies or secure ftp's. There are several tools that accomplish the requirements, please refer to the [Appendices], where you will find the most common ones and examples of use.
Transferring large files
For large amounts of data we recommend the usage of sl2.bsc.es login node. Besides scp and sftp, there are some other useful transfer protocols:
- scp
localsystem$ scp localfile username@sl2.bsc.es:
username's password:

localsystem$ scp username@sl2.bsc.es:remotefile localdir
username's password:
- rsync
localsystem$ rsync -avzP localfile_or_localdir username@sl2.bsc.es:
username's password:

localsystem$ rsync -avzP username@sl2.bsc.es:remotefile_or_remotedir localdir
username's password:
- sftp
localsystem$ sftp username@sl2.bsc.es
username's password:
sftp> get remotefile

localsystem$ sftp username@sl2.bsc.es
username's password:
sftp> put localfile
GPFS Tapes
Tapes is a mid-long term storage filesystem that provides 400 PB of total space. You can access tapes from the Data Transfer Machine (transfer[1-4].bsc.es) under /gpfs/tapes/hpc/your_group.
NOTE: There is no backup of this filesystem. The user is responsible for adequately managing the data stored in it.
To move or copy from/to tapes you have to use our special commands, available in transfer[1-4].bsc.es or any other machine by loading "transfer" module. These commands can transfer data between gpfs, slgpfs and AA.
- dtcp, dtmv, dtrsync, dttar
These commands submit a job into a special class performing the selected command. Their syntax is the same than the shell command without 'dt' prefix (cp, mv, rsync, tar).
- dtq, dtcancel
dtq
dtq shows all the transfer jobs that belong to you, it works like squeue in SLURM.
dtcancel <job_id>
dtcancel cancels the transfer job with the job id given as parameter, it works like scancel in SLURM.
- dttar: submits a tar command to queues. Example: Taring data from /slgpfs/ to /gpfs/tapes/hpc
dttar -cvf /gpfs/tapes/hpc/group01/outputs.tar ~/OUTPUTS
- dtcp: submits a cp command to queues. Remember to delete the data in the source filesystem once copied to destination to avoid duplicated data.
# Example: Copying data from /slgpfs to /gpfs/tapes/hpc
dtcp -r  ~/OUTPUTS /gpfs/tapes/hpc/group01/
# Example: Copying data from /gpfs/tapes/hpc to /slgpfs
dtcp -r  /gpfs/tapes/hpc/group01/OUTPUTS ~/
- dtrsync: submits a rsync command to queues. Remember to delete the data in the source filesystem once copied to destination to avoid duplicated data.
# Example: Copying data from /slgpfs to /gpfs/tapes/hpc
dtrsync -avP  ~/OUTPUTS /gpfs/tapes/hpc/group01/
# Example: Copying data from /gpfs/tapes/hpc to /slgpfs
dtrsync -avP  /gpfs/tapes/hpc/group01/OUTPUTS ~/
- dtsgrsync: submits a rsync command to queues switching to the specified group as the first parameter. If you are not added to the requested group, the command will fail. Remember to delete the data in the source filesystem once copied to the other group to avoid duplicated data.
# Example: Copying data from group01 to group02
dtsgrsync group02 /slgpfs/projects/group01/OUTPUTS /slgpfs/projects/group02/
NOTE: If you have a user "A" without access to StarLife in the group "group01" and another user "B" with access to StarLife in the group "group02", you can request us to add the group "group02" as a secondary group to the user "A" to be able to transfer data from /gpfs to /slgpfs with the following command directly:
dtsgrsync group02 /gpfs/projects/group01/OUTPUTS /slgpfs/projects/group02/
- dtmv: submits a mv command to queues.
# Example: Moving data from /slgpfs to /gpfs/tapes/hpc
dtmv ~/OUTPUTS /gpfs/tapes/hpc/group01/
# Example: Moving data from /gpfs/tapes/hpc to /slgpfs
dtmv /gpfs/tapes/hpc/group01/OUTPUTS ~/
Additionally, these commands accept the following options:
--blocking: Block any process from reading file at final destination until transfer completed.

--time: Set up new maximum transfer time (Default is 18h).
It is
Repository management (GIT/SVN)
There's no outgoing internet connection from the cluster, which prevents the use of external repositories directly from our machines. To circumvent that, you can use the "sshfs" command in your local machine.
Doing that, you can mount a desired directory from our GPFS filesystem in your local machine. That way, you can operate your GPFS files as if they were stored in your local computer. That includes the use of git, so you can clone, push or pull any desired repositories inside that mount point and the changes will transfer over to GPFS.
Setting up sshfs
Create a directory inside your local machine that will be used as a mount point.
Run the following command below, where the local directory is the directory you created earlier. Note that this command mounts your GPFS home directory by default.
sshfs -o workaround=rename <yourHPCUser>@sl2.bsc.es: <localDirectory>
From now on, you can access that directory. If you access it, you should see your home directory of the GPFS filesystem. Any modifications that you do inside that directory will be replicated to the GPFS filesystem inside the HPC machines.
Inside that directory, you can call "git clone", "git pull" or "git push" as you please.