
Visual Studio Code Remote Connection

Visual Studio Code is arguably the most popular code editor right now, but given its User Interface, it's not as straight-forward to use in remote systems as Vim, Nano, or other popular, command-line editors.

It's possible, though, to configure VSCode to establish a remote connection to a host, and navigate its file system as if it was in the local machine, making it possible to develop code comfortably with its GUI.

caution

Visual Studio Code Remote explorer doesn't work on the CTE-POWER, HSM Compute, Huawei due to incompatible architecture, and in Minotauro because of the deprecated glibc versions.

Installing required extensions

To be able to develop remotely using VSCode you need at least the two following extensions, developed by Microsoft themselves:
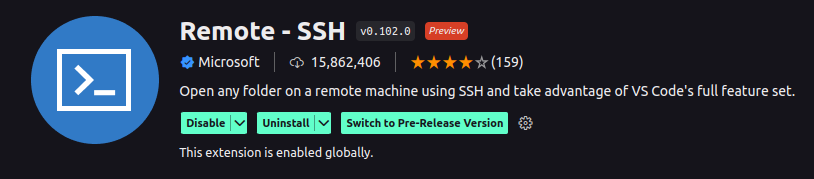
Remote - SSH

Allows you to establish remote connections to machines and navigate through them. Doesn't do much by itself, and is not necessary to connect via SSH from a Terminal in a VSCode tab, since that uses the system's SSH client.
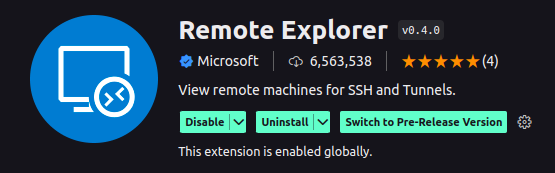
Remote - SSH extension

Remote Explorer

This is the extension that actually allows you to open remote directories and files, to edit them from your local machine. It can't function properly without the Remote - SSH extension.

Remote Explorer extension

This assumes you have an SSH client installed, in case you don't, you can install OpenSSH for Unix-based distributions:

DistributionCommand
Debian/Ubuntusudo apt install openssh-client
OpenSUSEsudo zypper install openssh
Arch/Manjarosudo pacman -S openssh
Fedorasudo dnf install -y openssh-clients

For Windows systems, you can install Putty and configure it.

Setting up your .ssh/config

~/.ssh/config is a very useful file that allows you to add different options to your SSH client. For example, forcing the use of the -X option to enable Direct X forwarding, or multiple other configuration setting. This is important because VSCode takes the list of accessible hosts from the SSH config files. Below is an example of an entry:

Host                    mn2
HostName mn2.bsc.es
User bscXXYYY

This allows you to type ssh mn2 instead of ssh bscXXYYY@mn2.bsc.es, to begin a connection to the second MN4 login node.

  • Host should contain any alias you may want to use, multiple entries are allowed, separated by blank spaces.
  • Hostname is the actual name of the login node.
  • User is the username with which you access the machine.

You can find more information here.
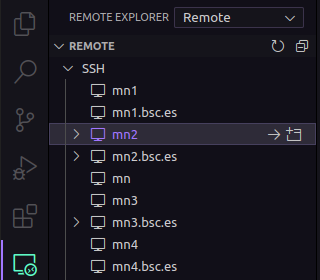
First connection

info

This process has to be repeated every time VSCode is updated.

Once you are done with the configuration, your Remote Explorer tab should look something like this. You can then pick whichever to start a connection, then select Linux as the host's operating system. The first connection may take a couple of minutes, so be patient.

Remote Explorer hosts

The problem is, VSCode needs a higher stack size than what is available by default in most nodes. So after a while you will likely get a "Connection refused" error (you can find it by clicking on details in the small pop-up windows, which will open a console). At this point, you can abort the connection and access the machine via normal SSH. VSCode will have created a hidden directory in your home, called .vscode-server.

Changing the Stack size

Since VSCode needs a smaller stack size, we can modify it in two ways: the first one, and most straightforward, would be to edit your ~/.bashrc file, and add a line containing ulimit -Ss 128000, so that it's set every time you access the machine.

danger

Changing the stack size to a smaller size may occasionally generate segmentation faults for some software, and its origin can be hard to track. This issue can be worked around by using the following method.

This second method revolves around creating a wrapper executable in the remote machine:

Wrapper method

info

A wrapper is a function that calls another subroutine, with the purpose of abstracting some of the complexity. In this context, it's a bash script that shares the original name of a program, and does some additional operations before calling it.

In your .vscode-server directory, there should be a bin directory, which should contain a directory with a long name formed by letters and numbers. Within that directory is the actual executable that VSCode uses to run in remote, called node (example: /home/bscXX/bscXXYYY/.vscode-server/bin/97dec172d3256f8ca4bfb2143f3f76b503ca0534).

  • Rename the executable to, for example, .node (that way it will be a hidden file).
mv node .node
  • Create a file called node, which will be our wrapper, and write the following content in it:
#!/bin/bash
ulimit -Ss 128000
SCRIPTPATH="$( cd -- "$(dirname "$0")" >/dev/null 2>&1 ; pwd -P )"
$SCRIPTPATH/.node $@

What this does is set the ulimit, then write the path to the current file to SCRIPTPATH, and finally executing the binary, passing all the parameters. The reason the path to the executable is obtained from commands instead of hard-coded once is that a new directory is generated every time VSCode is updated, so it would only be necessary to copy-paste the wrapper inside the new directory, rather than editing it.

  • Change permissions to make the wrapper executable:
chmod 755 node

And that about wraps it up, next time you attempt a remote connection everything should work fine. For any further questions, contact us at support@bsc.es.